How to configure a virtual machine in Antidetect Patreon 4
Last modified:
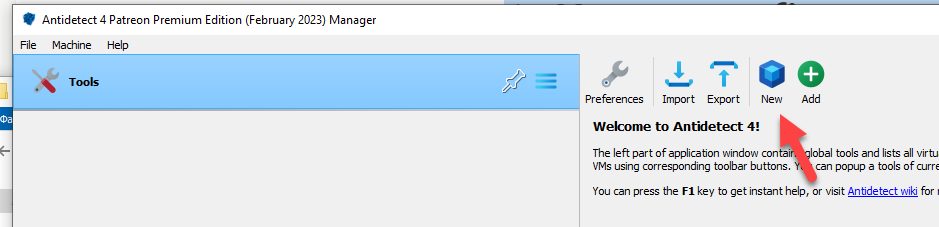
1) Run Antidetect and click “New"
2) Enter the name of your VM and ISO file. We recommend to use Windows 10 Home or Windows 10 Pro
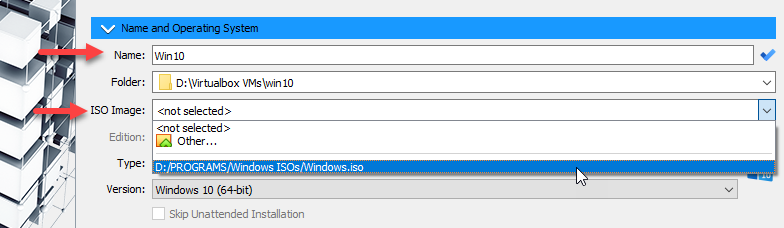
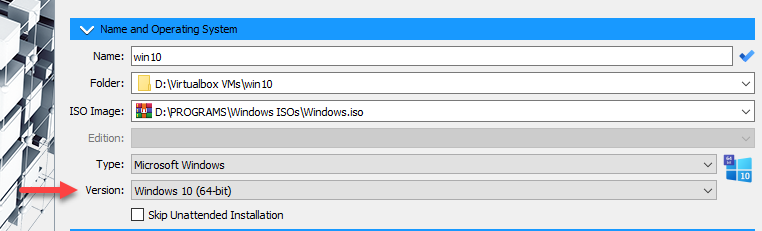
3) Select version of your OS (x64)
 Antidetect works only with x64 operating systems!
If you want to install VM manually, check “Skip Unattended Installation”.
 If you skip unattended installation, you will not be allowed to choose presets. Also, “AntiOS” and “Network” tabs will be inactive.
4) Unattended install. Choose your username and password (you can leave it empty).
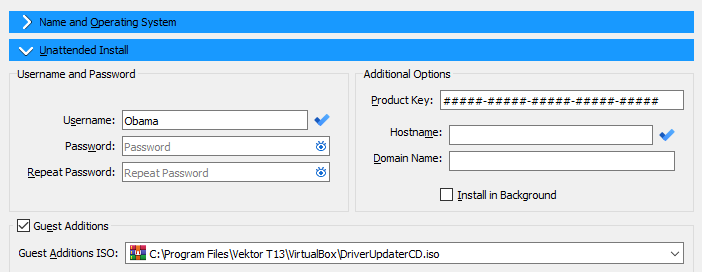
Guest additions ISO includes important files (such as video drivers, files for presets etc.), so it is checked by default.
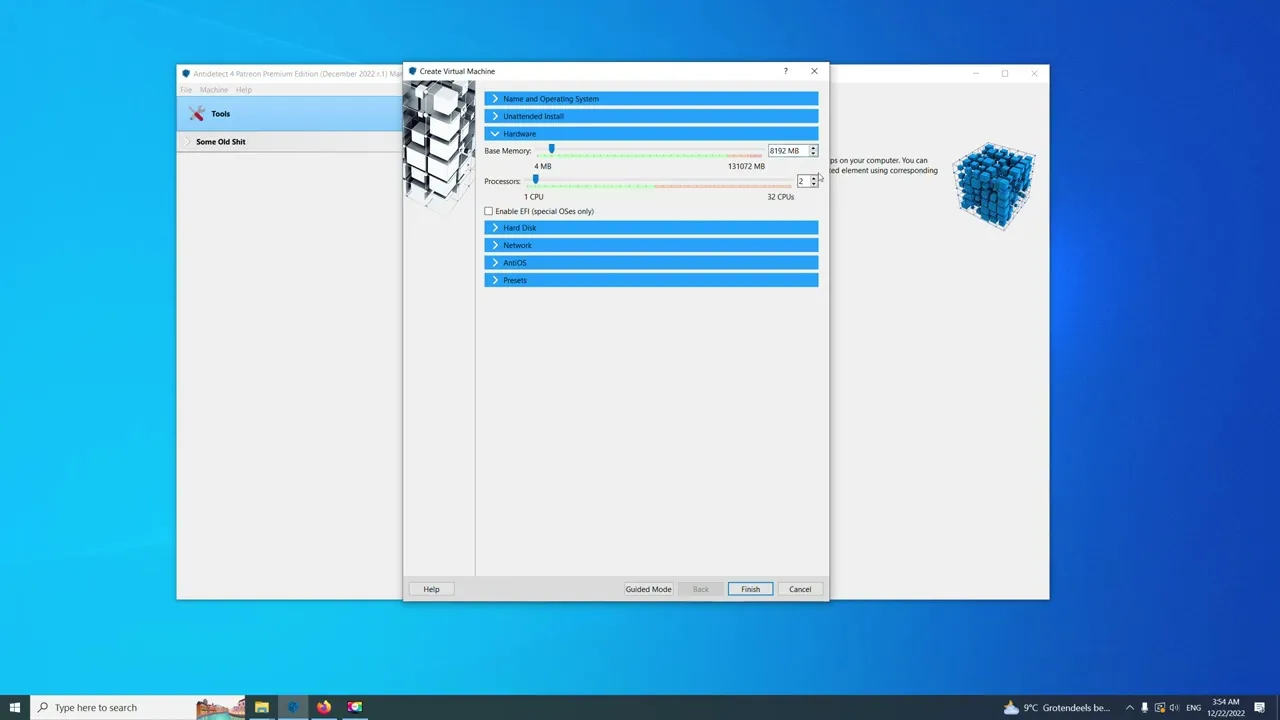
5) Hardware. We recommend to use 8 GB memory and 4 processor cores.

The ”Enable EFI” checkbox is set automatically depending on your operating system. There is no need to change it.
6) Hard disk. You can change disk location and its size. In this guide we will just leave it as it is.
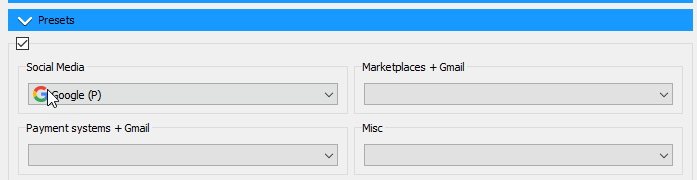
7) Choose your preset (for example Google). Note that some presets are inactive because they are available only in Personal edition.
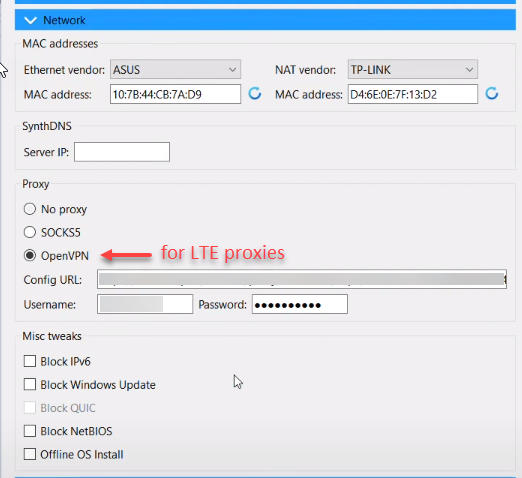
8) Network
First, choose network vendors and mac addresses. If you are Antidetect Personal Edition owner, you can specify SynthDNS Server IP (watch this video for details).
Next, configure proxy settings. Of course, you can leave the parameter “No proxy”, but we strongly recommend to set proxy. The list of good residential and LTE proxies is available on our website https://detect.expert/proxy/
If you use LTE (mobile) proxy, choose “OpenVPN” option.
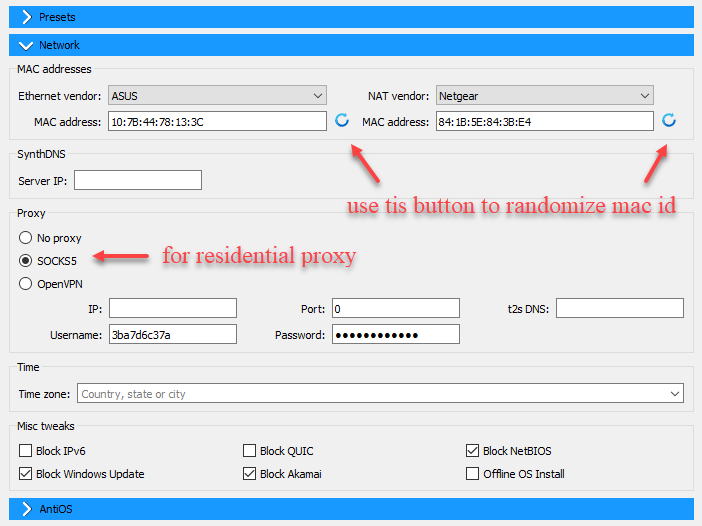
Watch this video to get more information about QUIC protocol and TCP / UDP traffic.
9) Configure AntiOS. You can choose any available option if you need.
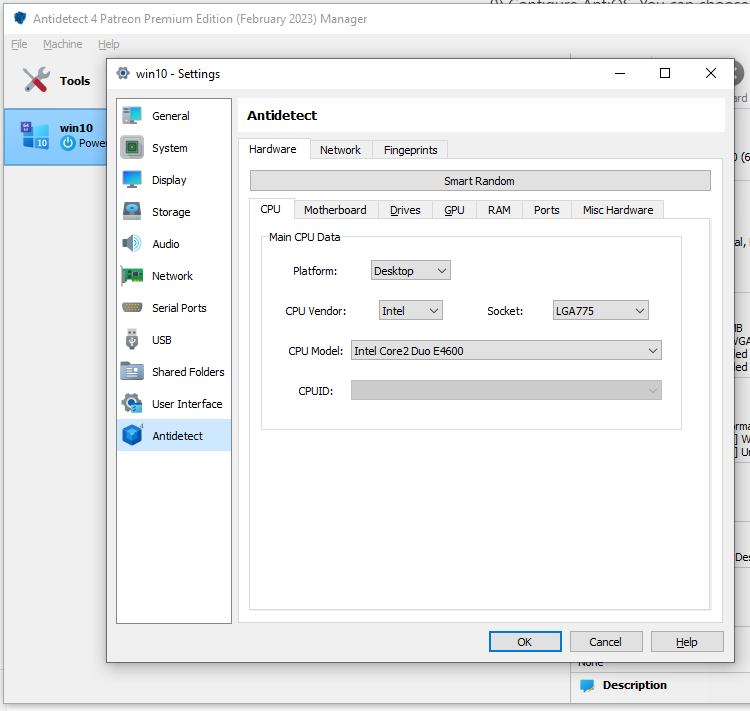
After all steps are completed, just click “Finish” and start your machine. If you want to make some additional changes, you can go to VM settings. Note that in Antidetect 4 you don’t need to click “Smart Random” button anymore because all hardware is already configured.
Video guide