How to proxy AntiDetect virtual machine
Last modified:
In this article, we will discuss three of the easiest and most reliable ways to proxy a VM.
Method I. Setting up proxy when creating a virtual machine
Advantages:
- simplicity
- reliability
- proxy setup at Windows installation
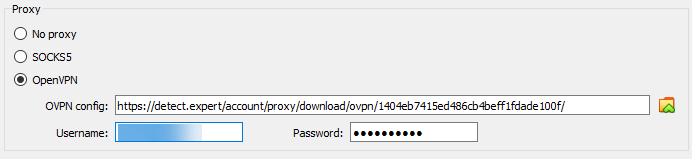
When creating a new AntiDetect virtual machine, in the "Network" tab, check the "OpenVPN" checkbox and then specify the path to the OVPN file, login, and password:
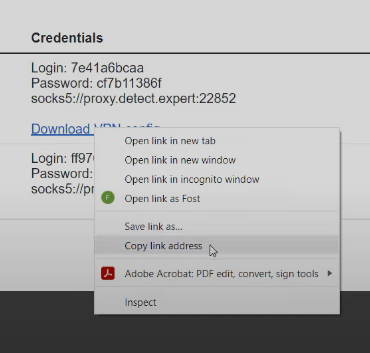
 If your proxies were purchased on detect.expert, you can copy the path to the OpenVPN file directly on the site by right-clicking on the "Download VPN Config" link:
After that, the virtual machine will automatically make all necessary network settings and connect to the proxy server.
Method II. Setting up with Proxifier and CheckWebRTC
Advantages:
- convenient management of all proxies in one place
- пeasy to use/li>
- proxy setup at Windows installation
Disadvantages:
- Proxifier does not support UDP.
 To work with UDP protocol and WebRTC, in this example, we use a separate utility CheckWebRTC, which is only supplied with the Personal version of AntiDetect.
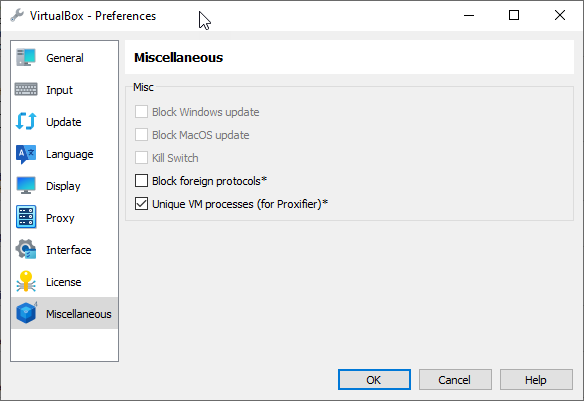
- In the AntiDetect settings menu ("File" -> "Settings" -> "Miscellaneous"), check "Unique VM processes"
- This setting is mandatory as it allows AntiDetect to create a separate file for each virtual machine, which is necessary for Proxifier to work.
- In this case, you need to run AntiDetect as an administrator.
- Start the virtual machine
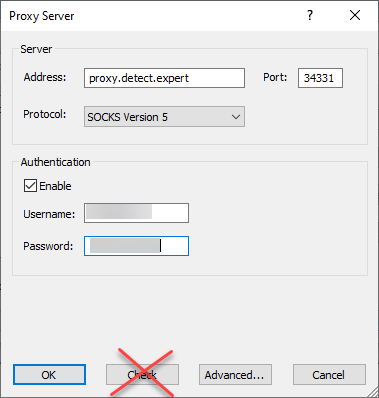
- Launch Proxifier on the host machine, go to "Profile" -> "Proxy Servers" -> "Add"
- Specify the parameters of the proxy server.
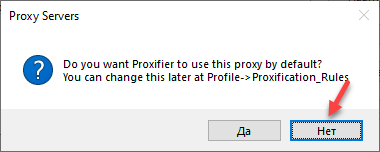
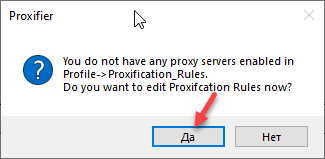
- Click No (do not set the proxy as default)
- Click Yes (confirm proxy rules change)
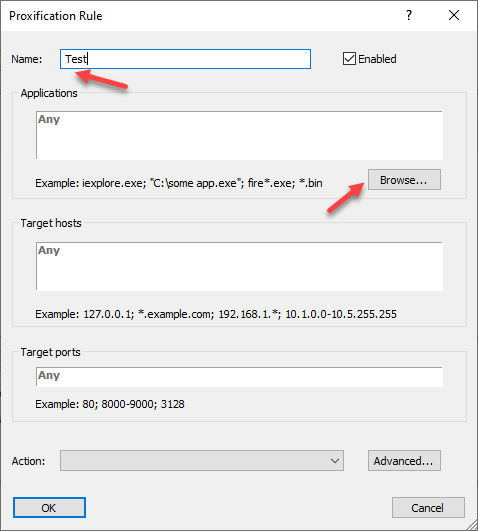
- Add a proxy rule. To do this, click "Add", enter any name, and specify the path to your virtual machine file.
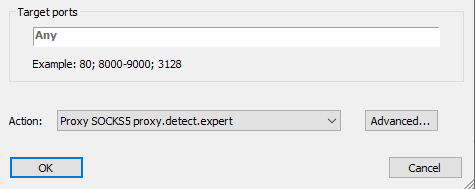
- Specify Action detect.expert
- Go to "Profile" -> "Advanced" -> "Services and another users" and check "Applications run by other users on this computer."
- If you have the Personal version of AntiDetect, run the CheckWebRTC file on your virtual machine.
Do not press the "Check" button
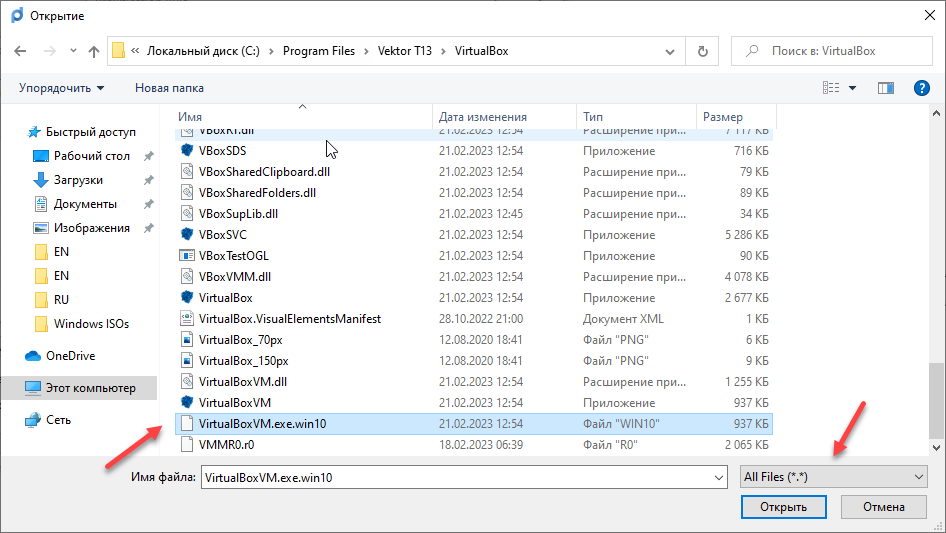
The VM file is stored in the folder C:\Program Files\Vektor T13\VirtualBox. The file name contains the name of the virtual machine. For example, if your virtual machine is named win10, then the file path will be:
C:\Program Files\Vektor T13\VirtualBox\VirtualBoxVM.exe.win10
After confirmation, a separate proxy rule will be created for this virtual machine. This way, an unlimited number of VMs can be created with different proxies.
Способ III. Tun2socks
This method only works if your proxy supports the UDP protocol.
ПAdvantages:
- tun2Socks supports UDP protocol
- simple setup
Disadvantages:
- there are very few proxy services that support UDP
- cannot proxy the entire operating system installation process
- unstable connection in some cases
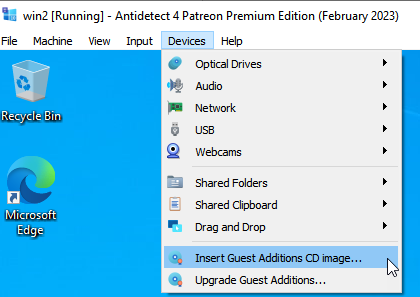
- Start the virtual machine, go to the "Devices" -> "Insert Guest Additions CD image".
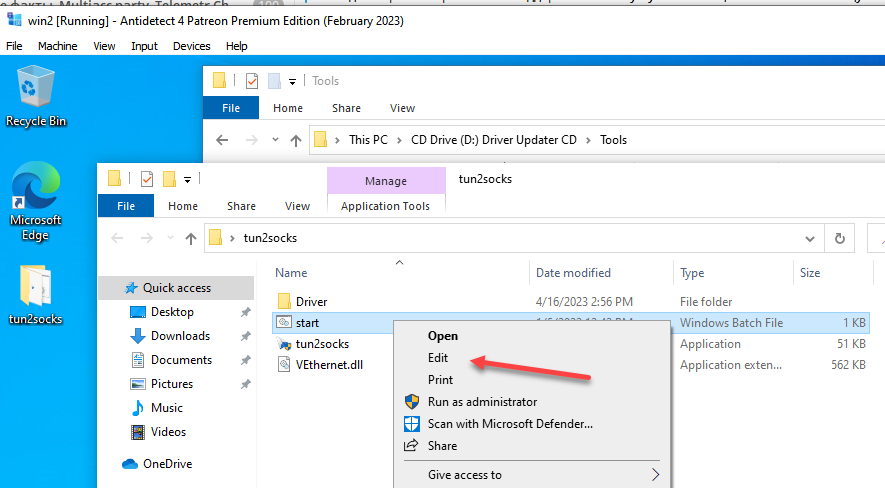
- If the disk did not open automatically, go to "My PC" -> "Driver Updater CD" -> "Tools."
- Move the tun2socks folder to the desktop, right-click the "start.bat" file, and select "edit."
- Specify your proxy server's details.
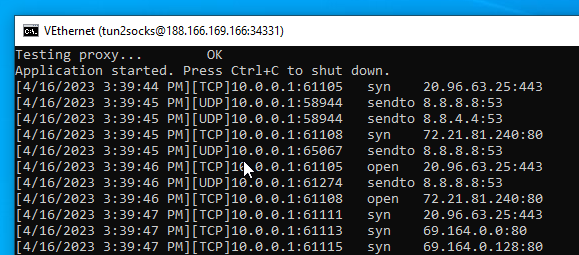
- Save and run the start.bat file as an administrator, click "Install" and wait for the connection